Replacing Broken Toilet Tanks
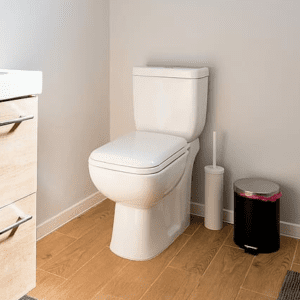
With the exception of the metal and plastic fittings inside the tank, toilets are really built to last a lifetime, but they are made of china and in their own way fragile. Every so often disaster strikes and the tank, tank lid, or the bowl will crack or break.
The tank lid is most susceptible to damage from being dropped or having something heavy dropped on it. The bowl is prone to breaking near the floor, largely due to over-tightening the bolts or loose bolts that allow the bowl to rock. A crack or clean break in the lid or around the floor nuts can sometimes be repaired with a strong epoxy or other glue intended for glass or china. The results, however, are seldom cosmetically appealing and it is risky to attempt to repair any part that carries water or is below the water line.
If the break is in the lid or the tank, you might be able to replace just those parts of the toilet leaving the base in place. We will talk about the alternative of installing a whole new toilet in another article.
Buying a Replacement Tank or Lid
Buying a replacement tank or lid is hard because sizes, shapes, and colors change year-to-year. Another problem is the 1990’s law mandating low-flow toilets. Low flow tanks don’t fit older style toilets.
If you can’t find what you need new, check local salvage yards or even call some builders to see if they have any renovations of old bathrooms scheduled. If all else fails, there are dealers on the Internet that stock hundreds of old tanks and lids. Search under “toilet tank lids.”
Measure the old tank carefully – height, width, and depth as well as the clearance between the wall and the tank to bowl outlet – and look for labels on the back or underside that might carry a model number. The manufacturers name is often stamped inside or on the back of the tank.
Assuming you find replacements, the actual job is very easy…
- Turn off the water supply and hold the flush handle down to drain as much water as possible; sponge out what remains in the bottom.
- Disconnect the water supply from the bottom of the tank, draining the water from the line into a bucket, then reach inside the tank and unthread the water line connector.
- The tank is secured to the toilet base with two bolts. Use a screwdriver inside the tank to unscrew the bolts while holding the nut below with an adjustable wrench. If the bolts are frozen, spray with a little WD-40, wait a few minutes and try again. If they are still stuck, cut the bolt between the bottom of the tank and the nut with a hacksaw.
- Lift the tank straight up and clear off the base, and dispose of properly.
- Most new tanks come with the internal mechanisms in place, but if yours needs assembly, do it before seating the tank.
- Place the spud washer (a type of gasket) in the toilet base inflow hole. Seat the tank firmly into the washer, making sure that the bolt openings in the tank and the base line up.
- Drop the bolts into the bolt holes and place the nuts over the ends. Finger-tighten the nuts as far as possible then use a wrench to finish. Do not over-tighten; the tank is easily cracked.
- Wrap the end of the water supply line with new Teflon tape and screw it into the intake valve, again tightening carefully.
- Turn on the water and use your fingers to check for leaks around the bolts.
- Flush and check around the spud washer. Place the lid on the tank and you are done.